
cssをやめて、sass使おう

CSSを使えば、簡単にウェブサイトのデザインを変えることができる。同じことをネイティブアプリでやると、骨折れるぐらい面倒くさいかもしれないが、ウェブなら数行のCSSでできてしまう。
しかし、CSSと長く付き合ってると、やっはり不便なとこを感じてしまう:
- 変数がない。スタイルを変更する際、何カ所も直さなちゃいけない。
- ブラウザ対応するに、-webkit-や-moz-などを書くのを繰り返すのが面倒くさい。
- セレクターが直感的にネストができないので、たまに混乱したりします。
ここで、cssを進化させたのはcompassです!
##compassとは?
compassはRubyのgemで、sass(もしくはscss)という拡張子のファイルをcssにコンパイルするツールです。使用イメージは:
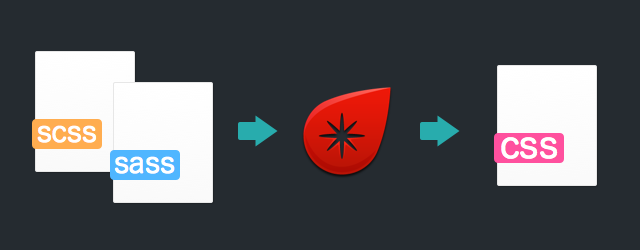
普通のブラウザはsass/scssファイルを認識しないので、直接スタイルシートとしては使えない!
compassをインストール
Macの場合
Macはデフォルトにrubyが入ってるので、ターミナルを開いて、下記のコマンドを叩いてください。
gem install compasswindowsの場合
まずrubyをインストール:http://rubyinstaller.org/。
インストール終わったら、コマンドツールで下記のコマンドを叩いてください。
gem install compassコマンドが嫌いな場合
MacならCodeKit(https://incident57.com/codekit/)というアプリがおすすめ。詳しくは公式サイトをチェック。
##新規sassプロジェクト
sassを利用したいプロジェクトフォルダへ移動して、下記のコマンドを叩く
compass createすると、フォルダの中にsass、stylesheetsこの二つのディレクトリーとconfig.rbが作成されます。sassはソースで、stylesheetsはコンパイルされたcssファイルの保存先です。開発イメージは、sass中のコードをいじって、compassによって、stylesheetsにcssファイルを書き出すという感じ。
早速sassフォルダの中のscreen.scssを開いてみよう。
/* Welcome to Compass.
 * In this file you should write your main styles. (or centralize your imports)
 * Import this file using the following HTML or equivalent:
 * <link href="/stylesheets/screen/" media="screen, projection" rel="stylesheet" type="text/css" /> */
@import "compass/reset";compass/resetをimportすることでブラウザ全てのデフォルトスタイルを一気にリッセトすることができます。compassはこのような便利なmixinがたくさん用意してます。例えば、”compass/css3”をimportすれば:
.class
{
	@include border-radius(4px);
}を書いて、コマンドcompass compileすると:
.class {
  -moz-border-radius: 4px;
  -webkit-border-radius: 4px;
  border-radius: 4px;
}上記のコードのように、-webkit-や-moz-などのプレフェイックスは全部作成してくれます。
###compass watch
いちいちcompass watch叩くのが面倒くさくなったら
compass watchというコマンドを使えば、compassはファイルの変更を感知し、自動的にコンパイルしてくれます。これを使えばコーディイングに集中できる!
config.rb
sassプロジェクトを新規すると、config.rbという設定ファイルが作成されます。中身は大体こんな感じです:
require 'compass/import-once/activate'
# Require any additional compass plugins here.
 # Set this to the root of your project when deployed:
http_path = "/"
css_dir = "stylesheets"
sass_dir = "sass"
images_dir = "images"
javascripts_dir = "javascripts"
 # You can select your preferred output style here (can be overridden via the command line):
# output_style = :expanded or :nested or :compact or :compressed
 # To enable relative paths to assets via compass helper functions. Uncomment:
# relative_assets = true
 # To disable debugging comments that display the original location of your selectors. Uncomment:
# line_comments = false
  # If you prefer the indented syntax, you might want to regenerate this
# project again passing --syntax sass, or you can uncomment this:
# preferred_syntax = :sass
# and then run:
# sass-convert -R --from scss --to sass sass scss && rm -rf sass && mv scss sass
よく使う設定:
| 変数名 | 意味 |
|---|---|
| css_dir | cssファイルの書き出し先 |
| sass_dir | sassソースフォルダ |
| output_style | 書き出しスタイル(下記参照) |
###書き出しスタイル
####:nested 要素の親関係でインデントする。
#id {
	color: #000000;
}
	#id .class {
		color: #FFFFFF;
	}
		#id .class .child {
			color: blue;
		}
####:expanded インデントなし。
#id {
	color: #000000;
}
#id .class {
	color: #FFFFFF;
}
#id .class .child {
	color: blue;
}
####:compact コンパクトスタイル。
#id { color: #000000; }
#id .class { color: #FFFFFF; }
#id .class .child { color: blue; }
####:compressed
最小サイズ。
#id{color:#000000;}#id.class{color:#FFFFFF;#id.class.child{color:blue;}##sassの基礎
sassの文法はcssとあまり変わらないので、cssを書く感覚で書けばコンパイルされます。しかし、sassを使った上、普通のcssは書きたくないよね、ではsassがcssよりスマートなところを紹介しよう:
###変数
sassは変数使えます、変数はphpみたいに$マークを使います。
$my_color: red;
strong {
	color: $my_color;
}
###ネスト
sassはネストできます。
body {
	background-color: white;
 	#header {
		background-color: black;
 		h1 {
			color: white;
		}
	}
}
###mixin
よく使われそうなコードをmixinでまとめると、@includeでそのコードをいろんなところで呼び出せます。使い方は:
@mixin square($width) {
	display: block;
	width: $width;
	height: $width;
}
 .square {
	@include square(100px);
}
 .another-square {
	@include square(200px);
}
書き出しcssは:
.square {
  display: block;
  width: 100px;
  height: 100px;
}
.another-square {
  display: block;
  width: 200px;
  height: 200px;
}
##後書き
sassを使い始めたら、すごい便利と感じました。繰り返しの終わらないcssに飽きたら、ぜひ試してください。